Setting up a simple web server on OCI
Did you miss the news? Oracle has announced that a free tier for usage of OCI which includes 2 compute instances, 2 autonomous databases, among a set of other free resources up to a certain limit. This tier isn't going to be suitable for high performance workloads, but hey, it's a pretty good deal I think.
if you've been following my activity, you will notice I've been starting to do a bit more with OCI, and for me, what better time to have an actual play around.
In this post, starting from a completely clean slate (no Virtual networks, no compute instances, etc), I wanted to see how I go about setting up an accessible web server. I opted to try with Ubuntu, since that is my daily driver so I'll just be consistent.
So, head over to the console and navigate to the compute section:
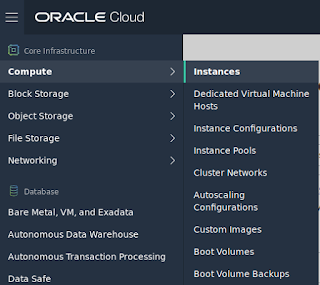
Once there, click the Create Instance button. You will see that it has by default selected Oracle Linux. So, let's see what else is available by clicking the Change Image Source button.

So, on this dialog - I am going to opt for Canonical Ubuntu 18.04 Minimal. Everything else I am going to leave as default - before creating the instance you will want to upload your public key in order to be able to connect to the server over SSH. So upload your public key either by pointing to the file in your system or by pasting it.
One other piece to notice is that because I don't have a network, OCI is going to create one for us.

Now, click the create button.
For me, the provisioning took under a couple of minutes.
Now that it's complete on the summary details page you will see it reports the private and public IP address information. So, naturally, our next step would be to ssh in to the server. I had read that instances come with the user opc, but in the case of ubuntu, the username is ubuntu.
First what you will want to do is update apt cache and upgrade any out of date packages.
Then, I will install nginx.
Once that process completes you can verify it's working by checking on the status and also calling wget on localhost - you should get an index.html downloaded to your current working directory.

So far so good. Now, if you go to your local system and try and access the server from the public IP address you will not get the page you expect.
Further, if you run nmap against the server, you will only see port 22.

So we need to perform 2 more steps before our server can be accessible to the internet.
Firstly, we need to modify our security list to accept connections on port 80.
So back in OCI, navigate to your virtual networks (Networking -> Virtual Cloud Networks).

On that page, you will see the newly create network. So open that, and navigate to Security Lists.

On that page, we will want to add a new ingress rule to accept connections for port 80. In this basic example, I'm just opening it for the whole subnet - much like SSH is. In a real world scenario, the architecture would likely be different.
My rule list looks like this:

After that rule, you will notice it's still not accessible. The next part is the firewall at the OS level. So, I'm just going to flush my ruleset on the server by running the following:
Source:
- https://serverfault.com/questions/129086/how-to-start-stop-iptables-on-ubuntu
- https://stackoverflow.com/questions/54794217/opening-port-80-on-oracle-cloud-infrastructure-compute-node
After that, we can finally access the server in our web browser over the internet. Yay!
if you've been following my activity, you will notice I've been starting to do a bit more with OCI, and for me, what better time to have an actual play around.
In this post, starting from a completely clean slate (no Virtual networks, no compute instances, etc), I wanted to see how I go about setting up an accessible web server. I opted to try with Ubuntu, since that is my daily driver so I'll just be consistent.
So, head over to the console and navigate to the compute section:

Once there, click the Create Instance button. You will see that it has by default selected Oracle Linux. So, let's see what else is available by clicking the Change Image Source button.

So, on this dialog - I am going to opt for Canonical Ubuntu 18.04 Minimal. Everything else I am going to leave as default - before creating the instance you will want to upload your public key in order to be able to connect to the server over SSH. So upload your public key either by pointing to the file in your system or by pasting it.
One other piece to notice is that because I don't have a network, OCI is going to create one for us.

Now, click the create button.
For me, the provisioning took under a couple of minutes.
Now that it's complete on the summary details page you will see it reports the private and public IP address information. So, naturally, our next step would be to ssh in to the server. I had read that instances come with the user opc, but in the case of ubuntu, the username is ubuntu.
First what you will want to do is update apt cache and upgrade any out of date packages.
sudo apt updatesudo apt upgrade
Then, I will install nginx.
sudo apt install nginx-light
Once that process completes you can verify it's working by checking on the status and also calling wget on localhost - you should get an index.html downloaded to your current working directory.

So far so good. Now, if you go to your local system and try and access the server from the public IP address you will not get the page you expect.
Further, if you run nmap against the server, you will only see port 22.

So we need to perform 2 more steps before our server can be accessible to the internet.
Firstly, we need to modify our security list to accept connections on port 80.
So back in OCI, navigate to your virtual networks (Networking -> Virtual Cloud Networks).

On that page, you will see the newly create network. So open that, and navigate to Security Lists.

On that page, we will want to add a new ingress rule to accept connections for port 80. In this basic example, I'm just opening it for the whole subnet - much like SSH is. In a real world scenario, the architecture would likely be different.
My rule list looks like this:

After that rule, you will notice it's still not accessible. The next part is the firewall at the OS level. So, I'm just going to flush my ruleset on the server by running the following:
sudo iptables -P INPUT ACCEPT sudo iptables -P OUTPUT ACCEPTsudoiptables -P FORWARD ACCEPTsudoiptables -F
Source:
- https://serverfault.com/questions/129086/how-to-start-stop-iptables-on-ubuntu
- https://stackoverflow.com/questions/54794217/opening-port-80-on-oracle-cloud-infrastructure-compute-node
After that, we can finally access the server in our web browser over the internet. Yay!

